Adding Public SSH key in Oracle Cloud Infrastructure Gen 2 !!
Hi Guys,
In today’s post, will see how to add new public key to the OCI instance which was already created.
Followed the document https://docs.cloud.oracle.com/iaas/Content/Compute/References/serialconsole.htm
High-level Steps:
- Create a new pair of Public and Private key pair require to upload using PUTTYGEN.
- Install Git or if you have a linux server, go the server and by using ssh-keygen create the public and private key which will be used in the console connection of the OCI instance.
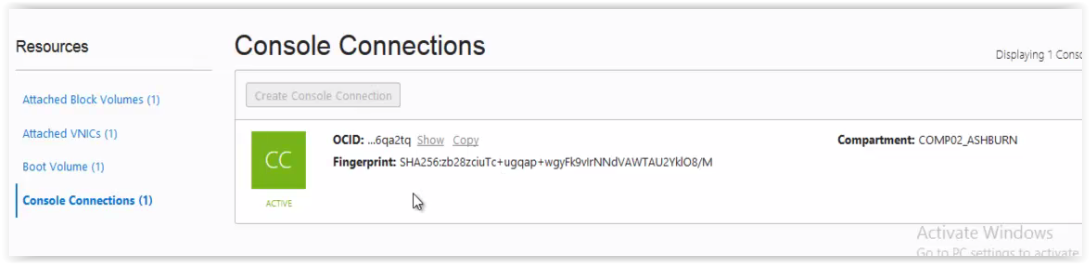
- Now, go the OCI instance and click on console connection and create a one using the public key generated in Git or linux server.
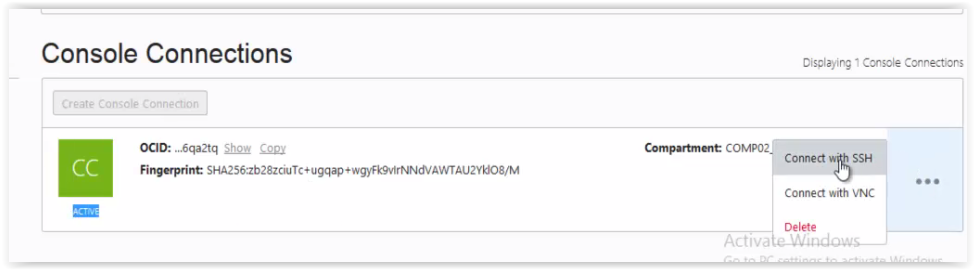
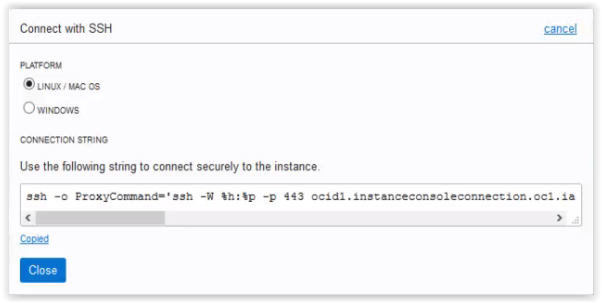
- Once, the console connection is active, click on connect SSH, copy the command and paste in the Git or linux server.
- After pasting the command supply the password of the key and it will connect remotley to the OCI instance.
- Now, go to OCI instance GUI, reboot the system and edit the kernel to start in bash prompt.
- Once you get in to bash prompt edit the authorized keys of the OPC user and restart the machine.
- After restarting machine try to connect with the private key(which was assoicated with public key generated through PUTTYGEN) it should have to connect successfully.
Steps:
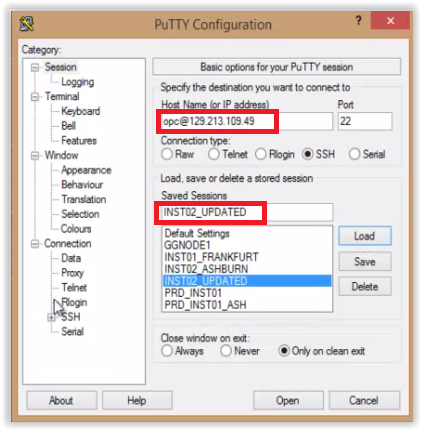
Using the below link, please create key pair using PUTTYGEN.
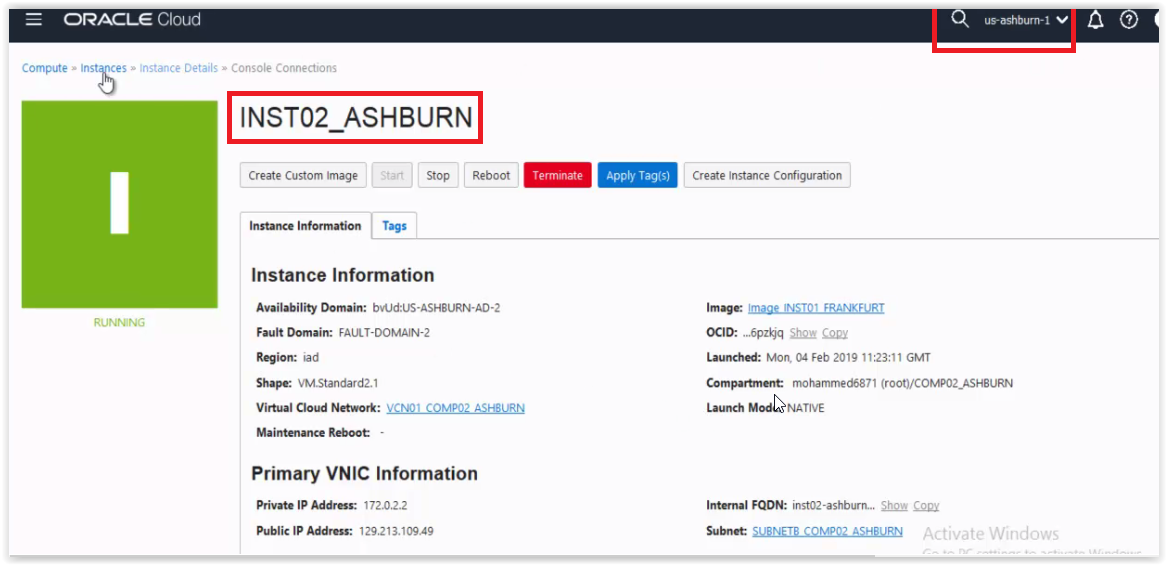
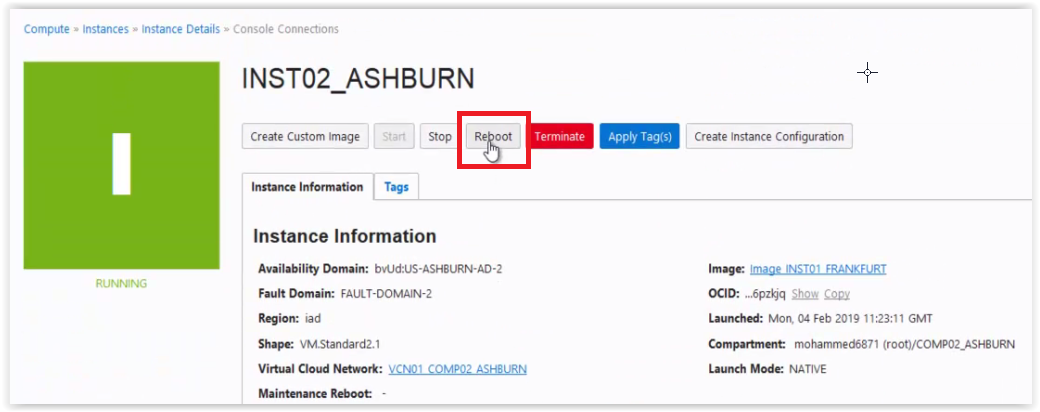
Below is my instance to which I upload the new key:
In my case I’m using a Linux test server instead of Git and try to create the keys to create console connection.


Once console connection is active, click Connect with SSH and copy the command to execute in linux test server.
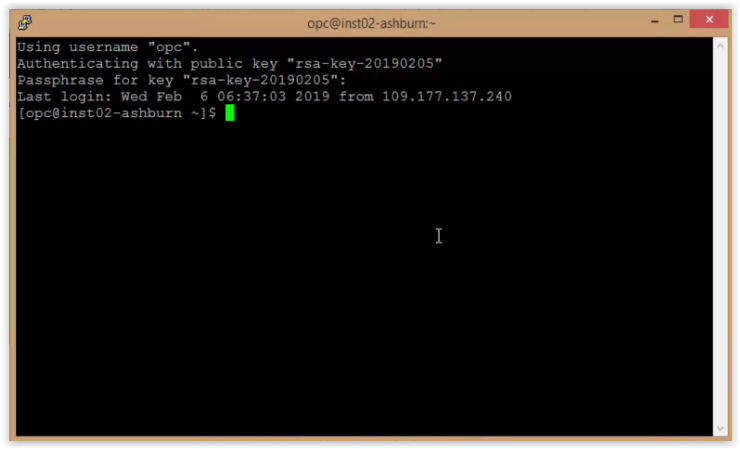
Successfully connected remotely to the OCI instance.

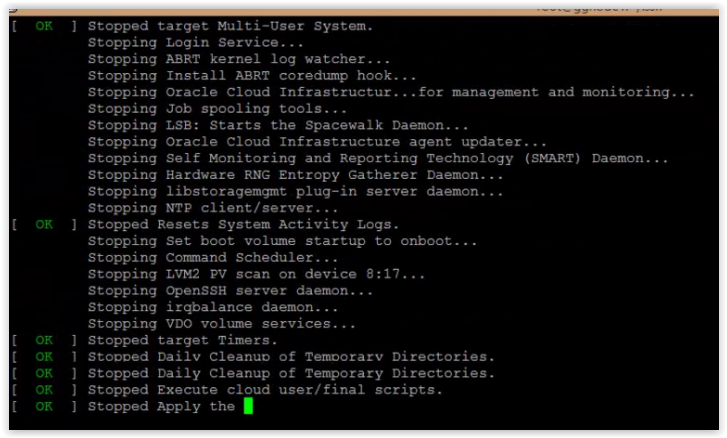
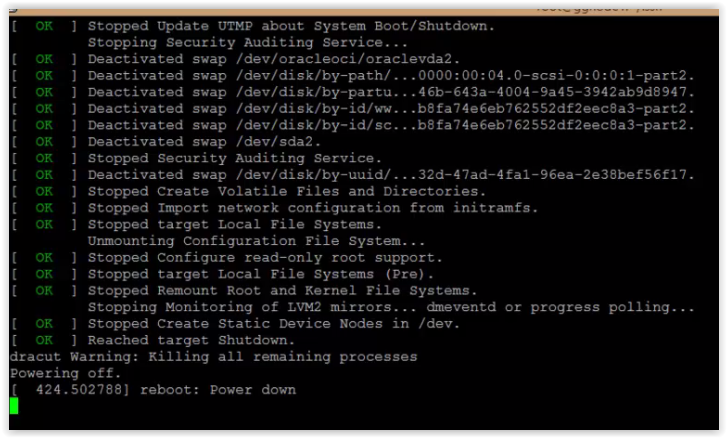
Reboot the OCI instance.
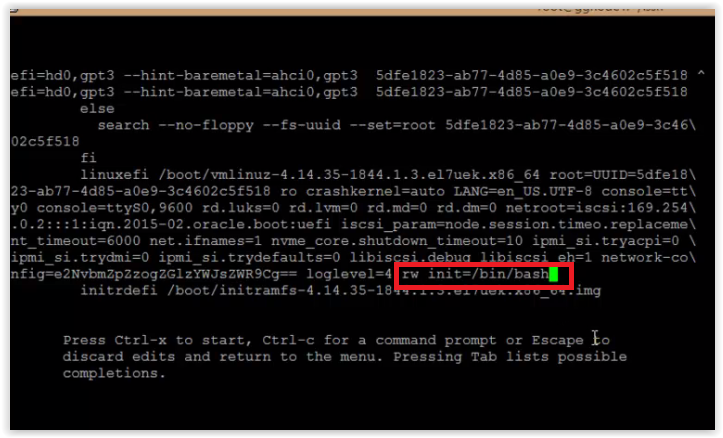
Select the kernel and hit ‘E’ to edit the kernel to run with bash prompt.
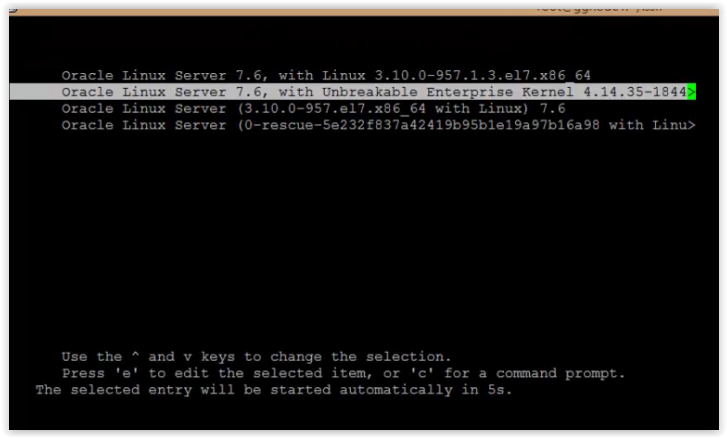
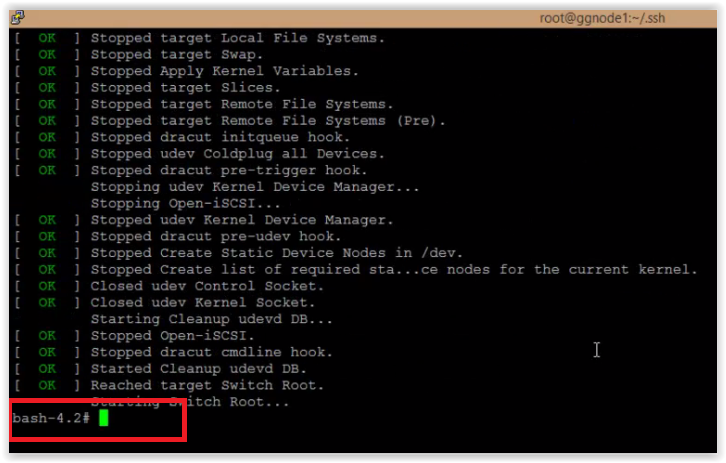
Editing the kernel using rw init=/bin/bash and press ctrl+x, which it will land on bash prompt.
Execute the below commands and update the new public key generated through PUTTYGEN to authorized_keys
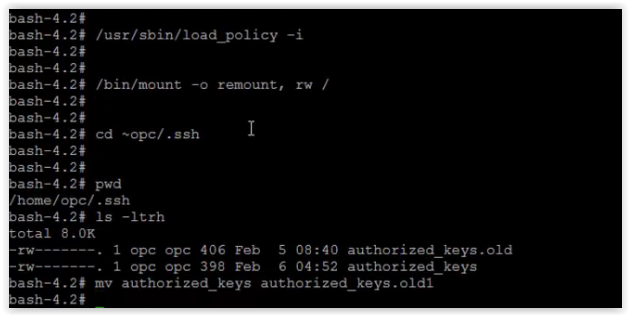
Copy the new key to the authorized_keys file save it.

Change the ownership and permissions of authorized_keys file and reboot the system.
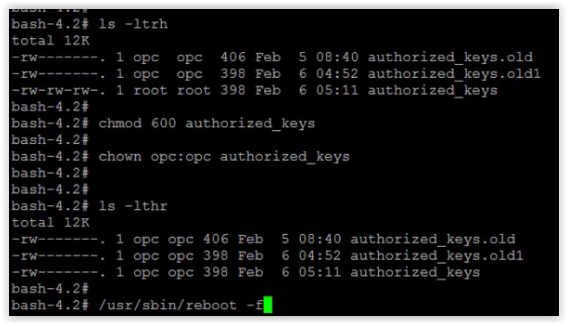


Now, connect to OCI instance with new private key, it should have to connect successfully.

Hope this post find’s you well !!
Happy learning !!
Firoz Hussain K.

Thanks for your detailed steps for connecting the instance. I followed all the steps.
When I tried to connect from my mac terminal, I am getting this error. Is there a need to specify private key. I invoked this from .ssh directory
ssh opc@140.238.161.167
Connection closed by 140.238.161.167 port 22
Once, I also got this error
ssh: connect to host 140.238.161.167 port 22: Connection refused
I did specify the private key as well, it did not work
ssh -i /Users/rshankar/.ssh/id_rsa opc@140.238.161.167
Connection closed by 140.238.161.167 port 22
Hi Manjula,
You have to convert the prviate key into SSH key compatibility, then after you should have to try.
Can you surf in the google and try to convert private key to SSH private key as you are using MAC.
Regards,
Firoz K. Hussain.
Oracle ACE Associate | Oracle Cloud Architect.
https://blog.hussaindba.com
Thanks for your response
I have used ssh-keygen on mac to generate the public and private keys on mac.
I will still google and check for ssh compatibility and if there are any issues
Hi Manjula,
I have replied to this question, you have to convert private key into SSH private key compatibility and try it.
Regards,
Firoz K. Hussain.
Oracle ACE Associate | Oracle Cloud Architect.
https://blog.hussaindba.com
Can you clarify this step
Editing the kernel using = rw init=/bin/bash and press ctrl+x, which it will land on bash promp
You screenshot does not show “=rw”, it only show “rw” and when i did that twice, the VM’s went unresponsive. I had to terminate them and relaunch new VM’s.
thanks for the post.
Hi Kd,
Thanks for approaching me, you should not have to give “=” before rw and it’s clear in the screenshot.
I will remove that equal sign from the post.
Thanks,
Firoz K. Hussain.
Email: firozhussain@gmail.com
Mob : +971551862816
Hi, I try it but I can’t start instance after add rw init=/bin/bash
After ctrl+x always this
https://ibb.co/3BCSq0B
Hello,
Can you send the screenshot of the same.
Regards,
Firoz K. Hussain.
Email: firozhussain@gmail.com
Can we replace the previous SSH key? Or delete the previous SSH key?
You can keep it but now with the same file name. Take a backup of the existing and replace with new one.
Regards,
Firoz K. Hussain.
Do you know why oci doesn’t provide the ability to add ssh key through the cloud UI?
Hi Aaron,
No, I don’t know.
Hai
Can I establish the same connection using a java program? If possible ,then please explain in detail.
In step 5, after you have copied the ssh command to connect to the hypervizor, you need to edit that command to provide the OpenSSH key corresponding to the public ssh key you provided when creating the console connection:
ssh -i // -o ProxyCommand=’ssh -i // -W %h:%p -p 443…
Thank you so much for this writing this procedure. I was able to recover an instance that somebody messed with the permissions of the authorized_keys file.
Hi Tiago,
Happy that posted procedure helped you to resolve the issue.
Regards,
Firoz K. Hussain.